Sanyo Webcam VPCX1220EX User Manual
Browse online or download User Manual for Camcorders Sanyo Webcam VPCX1220EX. Sanyo Webcam VPCX1220EX User's Manual
- Page / 82
- Table of contents
- BOOKMARKS
- VPC-X1220EX 1
- VPC-X1250 1
- VPC-X1220GX 1
- VPC-X1220PX 1
- About the battery charger 3
- English iv 5
- HOW TO READ THIS MANUAL 6
- 1 Press the [m] button 8
- 1 Install the software 10
- English x 11
- 6 Click on [Import] 12
- 7 Click on [Import] 13
- Dismounting the camera 14
- SHOOT, PLAY BACK AND SAVE 14
- English xiv 15
- CONTENTS 16
- English 2 17
- APPENDICES 17
- 3 English 18
- Attaching the handstrap 19
- 5 English 20
- PARTS NAMES 21
- 7 English 22
- CHARGING THE BATTERY PACK 23
- 9 English 24
- About the CHARGE indicator 25
- 11 English 26
- English 12 27
- 13 English 28
- English 14 29
- 15 English 30
- TURNING THE CAMERA ON AND OFF 31
- 17 English 32
- DATE AND TIME SETTING 33
- 3 Set the clock 34
- 5 Press the MENU button 35
- BEFORE TAKING PICTURES 36
- 2 Press the [m] button 37
- 4 Press the SET button 37
- 2 Press the SET button 38
- 4 Press the MENU button 39
- 25 English 40
- 2 Rest your finger on the 41
- 3 Gently press the shutter 41
- 27 English 42
- Shooting sequential shots 43
- 29 English 44
- 1 Press the playback button 45
- 2 View other images 45
- 2 Press [W] ([P]) on the 46
- 3 Select the image to play 46
- Folder playback 47
- 100SANYO 47
- 101SANYO 47
- 102SANYO 47
- 33 English 48
- 3 Delete the files 50
- English 36 51
- 2 Press the shutter button 52
- 3 End the recording 52
- 4 Press the playback button 53
- 5 Press the SET button 53
- 39 English 54
- English 40 55
- USING THE SCENE FUNCTION 56
- 3 Press the SET button 57
- 43 English 58
- 4 Press the shutter button 60
- OTHER RECORDING FUNCTIONS 63
- 49 English 64
- Flash setting 65
- 3 Press the shutter button 66
- Self-timer 67
- 53 English 68
- Focus range 69
- 55 English 70
- How to use the manual focus 71
- ACCESSING THE MENUS 72
- 2 Select the s or = tab 73
- 3 Press the [m] button 73
- SPECIFICATIONS 74
- English 60 75
- 61 English 76
- Camera connectors 77
- Battery life 77
- 63 English 78
- Supplied battery pack charger 79
- Supplied Li-ion battery pack 79
- 65 English 80
- English 66 81
- SANYO Electric Co., Ltd 82
Summary of Contents
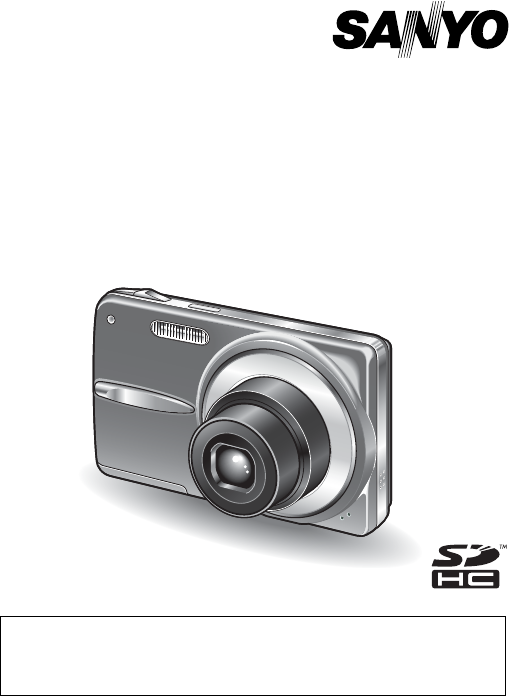
VPC-X1220EXVPC-X1250VPC-X1220GXVPC-X1220PXINSTRUCTION MANUALBASICSDigital CameraPlease read these instructions carefully before using the camera.Make
ix EnglishSHOOT, PLAY BACK AND SAVECopying files to a computer (Windows XP)1 Install the software.1 Insert the CD-ROM (SANYO Software Pack) that was
English x3 Select “COMPUTER”, and press the SET button.h The screen to select the connection mode appears.4 Select “CARD READER”, and press the SET
xi EnglishSHOOT, PLAY BACK AND SAVE6 Click on [Import].h The files in the camera are shown on the import screen.Files in the camera[Destination Folde
English xiiHINTYou can specify which folder to copy the files to.i When you click on the folder icon in the [Destination Folder] field, the screen to
xiii EnglishSHOOT, PLAY BACK AND SAVEDismounting the cameraCAUTIONi To disconnect your camera, be sure to follow the procedure below. Failure to follo
English xivCAUTIONInsert and pull out the cable carefullyi When connecting the cables, make sure that the cable plugs are correctly oriented and that
1 EnglishCONTENTSCONTENTS ... 1CHECKING THE INCLUDED ACCESSORI
English 2 APPENDICESSPECIFICATIONS ...59Camera ...
3 EnglishCHECKING THE INCLUDED ACCESSORIESi Handstrap: 1 i SANYO Software Pack (CD-ROM): 1i Lithium-ion battery pack (battery pack): 1i Lithium-ion ba
English 4Attaching the handstrapMedia cards that can be used with this cameraThe types of card that can be inserted into and used with this camera are
i EnglishWarning TO PREVENT THE RISK OF FIRE OR ELECTRIC SHOCK, DO NOT EXPOSE THIS APPLIANCE TO RAIN OR MOISTUREkFOR AMERICAN USERSThe following advis
5 EnglishCHECKING THE INCLUDED ACCESSORIESInstalling/removing the DC adaptor (Model VAR-A3: sold separately)Install in the camera's battery slot,
English 6SETUPPARTS NAMESFrontLensSelf-timer indicatorBattery/card compartment coverON/OFF buttonFlashShutter buttonUSB/AV terminalTripod stand holeBo
7 EnglishPARTS NAMESRearZoom switchMonitorSET buttonPlayback button [=][n] button[o] button[l] button[m] buttonStrap holderSCENE buttonMENU button
English 8CHARGING THE BATTERY PACKPlease charge the supplied battery pack before using it.1 Connect the supplied power cord to the socket on the batt
9 EnglishCHARGING THE BATTERY PACKCharging the battery packBe sure to fully charge the supplied or separately sold battery pack before using it in you
English 10About the CHARGE indicator The CHARGE indicator shows the status of the battery pack and the charger.Please refer to the following table if
11 EnglishCHARGING THE BATTERY PACKHINTAbout the internal backup batteryi This camera’s internal battery serves to maintain the date and time settings
English 12INSTALL THE BATTERY PACK AND CARDInstallationi Make sure that the battery pack and card orientation are correct.i The card can be used after
13 EnglishINSTALL THE BATTERY PACK AND CARDCAUTIONDo not remove the battery pack outer covering or labeli Do not use the battery with the outer coveri
English 14To format a card1 Install the card in the camera. Turn on the camera (pages 12 and 16).2 Display the menu (page 57).3 Display the Optio
English iiFOR USERS IN THE USAAbout the battery chargerIMPORTANT SAFETY INSTRUCTIONS – SAVE THESE INSTRUCTIONSDANGER – TO REDUCE THE RISK OF FIRE OR E
15 EnglishINSTALL THE BATTERY PACK AND CARDWarning concerning battery pack temperaturei If the battery pack in the camera becomes too hot, a blinking
English 16TURNING THE CAMERA ON AND OFFTurning on the cameraIn the recording mode1 Press the ON/OFF button.h The camera turns on.h The camera turns o
17 EnglishTURNING THE CAMERA ON AND OFFAbout the auto power off functionIn order to preserve battery pack power when, for example, the camera has acci
English 18DATE AND TIME SETTINGThe camera will record the date and time an image or audio recording is taken so that you can display them during playb
19 EnglishDATE AND TIME SETTING3 Set the clock.1 Select “TIME”.2 Press the SET button.h The Set Time Screen appears.3 Set the time to “19:30”.h The t
English 205 Press the MENU button.h The date and time setting is completed.h To display the Recording or Playback Screen, press the MENU button.HINTA
21 EnglishBASIC OPERATIONBEFORE TAKING PICTURESSwitching between the recording mode and playback modeSwitch between shooting and playing.1 Press the
English 22How to switch the recording modeYour camera can capture single still photos (single-shot mode), record video clips (video clip recording mod
23 EnglishBEFORE TAKING PICTURESSwitching the display modeIn the recording mode, you can select the either the “settings display mode” which allows yo
English 24Adjust the monitor brightnessThe brightness of the monitor is adjustable. Adjust the brightness to the optimum readability in the ambient li
iii EnglishPARA LOS USUARIOS DE EE.UU.Acerca del cargador de bateríasINSTRUCCIONES IMPORTANTE SOBRE DE SEGURIDAD - GUARDE ESTAS INSTRUCCIONESPELIGRO -
25 EnglishBEFORE TAKING PICTURESHints for taking picturesMuting the camera soundsi The operation sounds that are generated, for example, when the shut
English 26CAPTURING AND PLAYING BACK STILL IMAGESThere are two modes for capturing still images. In the single-shot mode, one image is captured each t
27 EnglishCAPTURING AND PLAYING BACK STILL IMAGES4 Release your finger from the shutter button.h The captured image is recorded.HINTAbout the target
English 28Shooting sequential shotsWhen the shutter button is pressed, still images are captured in succession.1 Set the camera to the sequential sho
29 EnglishCAPTURING AND PLAYING BACK STILL IMAGESHINTAbout the focus when shooting sequential shotsi When sequential shots are captured, the autofocus
English 30Viewing still imagesThe steps for viewing both single shots and sequential shots are the same.1 Press the playback button [=].h If the play
31 EnglishCAPTURING AND PLAYING BACK STILL IMAGES9-image/20-image display playback1 Press the playback button [=].2 Press [W] ([P]) on the zoom swit
English 32Folder playbackA convenient way to search through multiple folders, or to search for an image that was recorded using Screen Capture.1 Acce
33 EnglishCAPTURING AND PLAYING BACK STILL IMAGESMagnifying (zooming in) the image1 Display the image that you want to magnify.2 Press [T] ([]]) on
English 34Zoom jump playbackYou can magnify a portion of a still image to check the accuracy of the focus.1 Display a still image to view using zoom
English ivkFOR CANADIAN USERSi This Class B digital apparatus complies with Canadian ICES-003.kFOR EU USERSThe symbol mark and recycling systems descr
35 EnglishCAPTURING AND PLAYING BACK STILL IMAGESDeleting filesYou can delete files if you no longer need them. You can delete the files one at a time
English 36<To delete all the files>1 Use the [l] and [m] buttons to view the images and check if it is OK to delete all the files.2 Press the [n
37 EnglishVIDEO CLIP RECORDING AND PLAYBACKRecording a video clip1 Set the camera to the video clip recording mode (page 22).2 Press the shutter but
English 38Playing back the video clip4 Press the playback button [=].h If the playback button [=] was pressed to turn the camera on, however, press t
39 EnglishVIDEO CLIP RECORDING AND PLAYBACKOutline of playback operationTo do this... Do thisStop playback During playback, press the [o] button.Pause
English 40When you are finished viewing video clips...i Press the ON/OFF button to turn the camera off.CAUTIONHow to save one frame from a video clip
41 EnglishUSING THE SCENE FUNCTIONYou can select from a variety of preset settings (aperture, shutter speed, etc.) for specific shooting conditions.1
English 42m: Available n: Not available*: Disabled during recording3 Press the SET button.h This completes the scene select setting.h The display ret
43 EnglishUSING THE SCENE FUNCTIONCapture a still image with a voice memoWith the still-image-plus-audio a scene function, you can add an audio track
English 44How to use the best shot feature1 Set the camera to the single-shot mode; on the screen to select a scene function (page 41), select 5; and
v EnglishHOW TO READ THIS MANUALThis instruction manual for your camera is organized into the following sections.k SETUPBefore taking pictures with yo
45 EnglishUSING THE SCENE FUNCTIONHow to use the face chaser featureTo attain the best possible face shots, the camera automatically focuses on the fa
English 46How to shoot using Smile DetectionCapture a photo at the instant the subject smiles.Normal shooting1 On the screen to set the scene functio
47 EnglishUSING THE SCENE FUNCTION4 Use the arrow buttons to move the orange frame to the area that encompasses the target subject's face.5 Pre
English 48OTHER RECORDING FUNCTIONSUsing the zoomYour camera has two zoom functions: optical zoom and digital zoom.1 Set the camera to the recording
49 EnglishOTHER RECORDING FUNCTIONSHINTCan’t access the digital zoom?i The digital zoom cannot be used when the face chaser r, smile detection n or po
English 50Flash settingThe flash is used not only for taking pictures where there is insufficient light, but also when the subject is in shade or in b
51 EnglishOTHER RECORDING FUNCTIONS2 Press the [n] or [o] button to select the desired flash mode, and press the SET button.3 Press the shutter butt
English 52Self-timerSelf-timer photography is available in the single-shot mode.1 Set the camera to the single-shot mode (page 22), and press the [m]
53 EnglishOTHER RECORDING FUNCTIONSHINTi The countdown time until shutter release is shown graphically on the monitor.To pause or cancel the self-time
English 54Focus range1 Set the camera to the recording mode (page 21), and press the [o] (R) button.h The focus range menu appears.o: The focus opera
English viSHOOT, PLAY BACK AND SAVEInstall the battery pack1 Use the supplied charger to charge the battery pack.h The CHARGE indicator is lit during
55 EnglishOTHER RECORDING FUNCTIONS2 Press the [n] or [o] button to select the desired focus range, and press the SET button.h The specified focus ra
English 56How to use the manual focus1 Select manual - from the focus range menu, and press the SET button.h The focus distance adjustment bar appear
57 EnglishACCESSING THE MENUSDetailed camera settings are accessed from the menus.How to display the menus1 Turn on the camera, and set it to the rec
English 58How to operate the menusUse the arrow buttons to select the item you wish to change, press the SET button, and the corresponding screen will
59 EnglishAPPENDICESSPECIFICATIONSCameraImage file format Still images: JPEG format (DCF, DPOF, Exif 2.2 compliant) Note: Designed mainly by the Japan
English 60Lens 3.0× optical zoom lensf=6.3 mm to 18.9 mm (35 mm film camera conversion: 35 mm to 105 mm)Autofocus, 5 groups, 6 elements (4 with aspher
61 EnglishSPECIFICATIONSMonitor 2.7-inch (6.9 cm) TFT color LCDApprox. 230,000 pixels (Frame coverage: Approx. 100%)Brightness adjustment: 5-stepFlash
English 62Camera connectorsBattery lifei Until battery pack runs out when using a fully charged battery pack at a 25 °C (77 °F) ambient temperature.i
63 EnglishSPECIFICATIONSPossible Number of Images/Video Recording Time/Audio Recording Timei Up to 9 hours of continuous audio recording is possible.i
English 64Supplied battery pack chargeri The VPC-X1220GX and VPC-X1220PX models are supplied with a power cord that is appropriate for the region of d
vii EnglishSHOOT, PLAY BACK AND SAVEBefore capturing those important shots, be sure to first take a test shot to confirm that your camera is set up an
65 EnglishSPECIFICATIONSOthersMac OS and QuickTime are trademarks of Apple Inc., registered in the U.S. and other countries.Microsoft and Windows are
English 66Before capturing those important shots, be sure to first take a test shot to confirm that your camera is set up and ready to goi Sanyo Elect
SANYO Electric Co., Ltd.
English viiiPlaybackkStill image playback1 Press the playback button [=].h The display switches to the Playback Screen.h To view other images, press
Related products and manuals for Camcorders Sanyo Webcam VPCX1220EX
 (52 pages)
(28 pages)
(2 pages)
(52 pages)
(28 pages)
(2 pages)
 (4 pages)
(2 pages)
(79 pages)
(15 pages)
(48 pages)
(4 pages)
(96 pages)
(204 pages)
(251 pages)
(176 pages)
(2 pages)
(73 pages)
(211 pages)
(4 pages)
(2 pages)
(79 pages)
(15 pages)
(48 pages)
(4 pages)
(96 pages)
(204 pages)
(251 pages)
(176 pages)
(2 pages)
(73 pages)
(211 pages)
© 2020, manymanuals.com. All rights reserved. | 2.514 s |
 Manymanuals.com
 Manymanuals.de
 Manymanuals.fr
 Manymanuals.it
 Manymanuals.pl
 Manymanuals.cz
 Manymanuals.es
 Manymanuals-pt.com
Comments to this Manuals