4
English
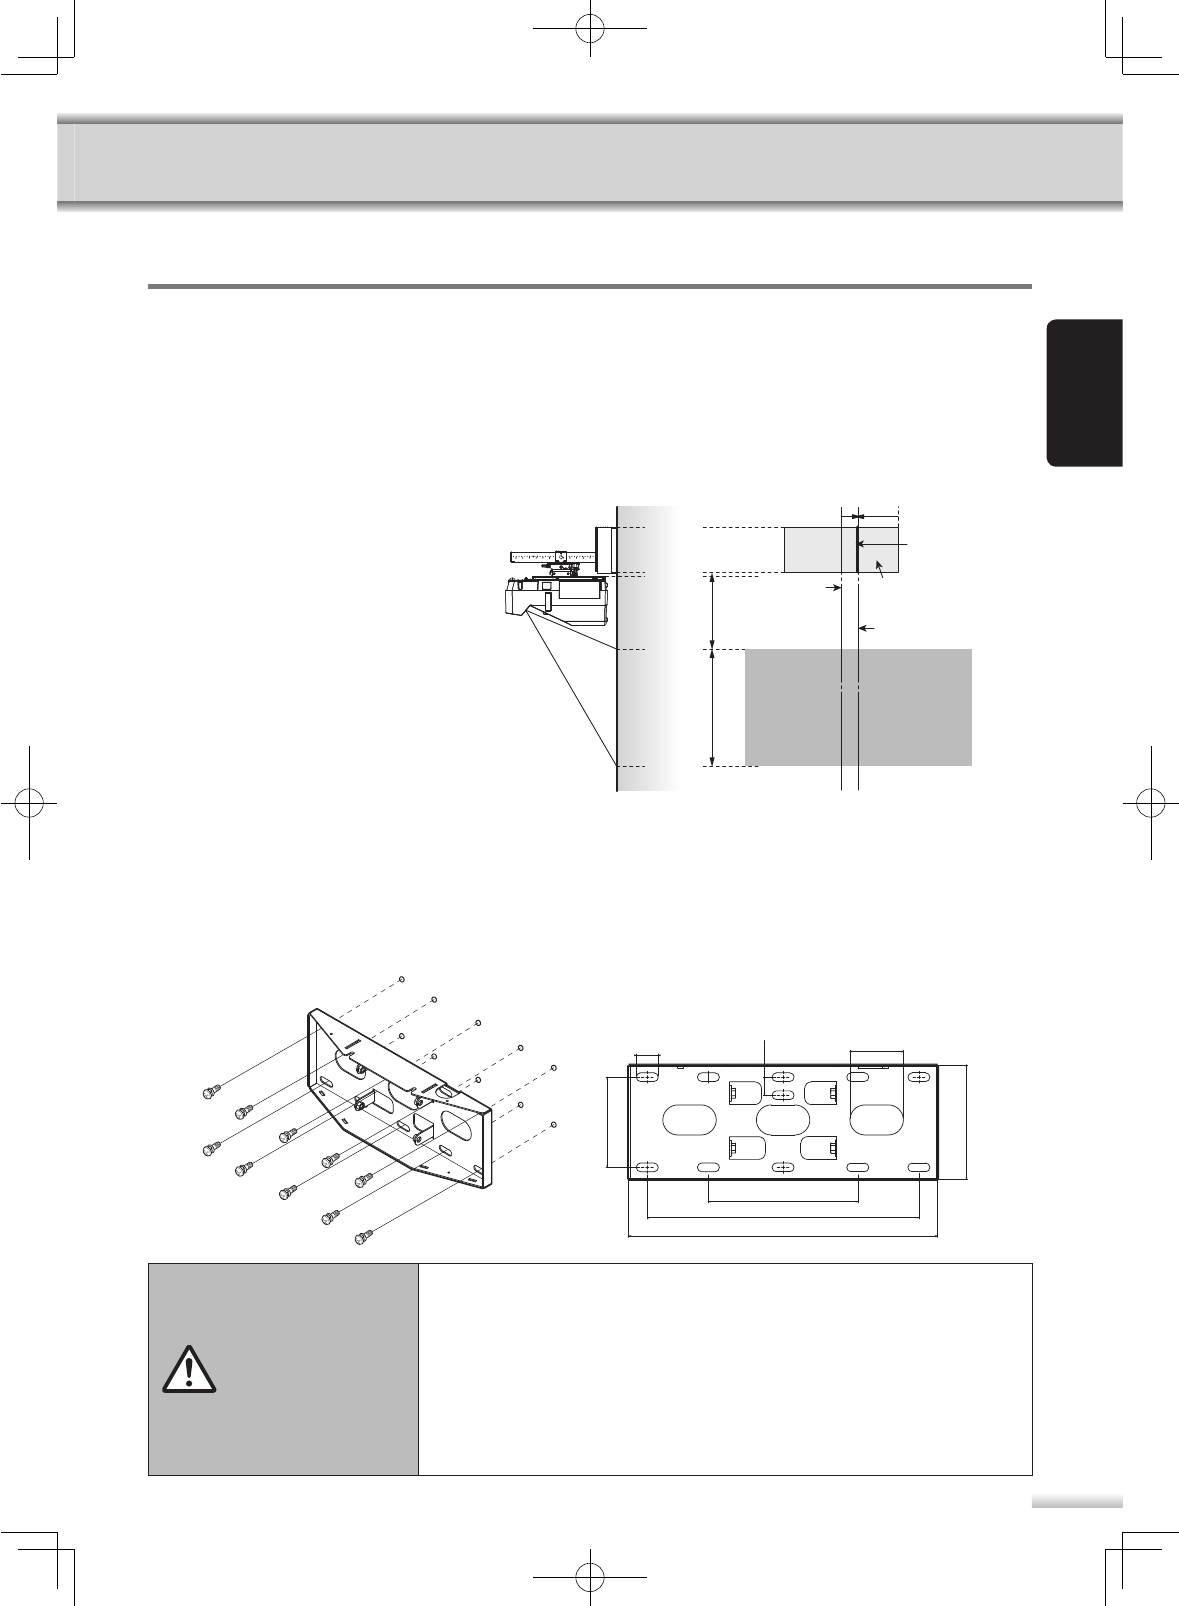
Installation Procedure
Install the wall plate to the wall
1
Determine the position of the wall plate using the template sheet.
From the projection distance table (page 10) and dimensions (page 11), confi rm the screen size and the ¡
distance between the projection surface and wall plate.
The wall plate and the projection surface have different vertical center lines. ¡
Align the CTR line (printed on the template sheet) with the center line of the projection surface as shown in
the illustration.
Confi rm where the beams are within the wall, ¡
and shift the position vertically or left and
right as necessary.
2
Attach the template sheet to the wall.
3
Make mounting holes in the wall in the required locations.
4
Remove the template sheet.
5
Mount the wall plate on the wall.
WARNING
When you install the projector to the wall with the setting plate, the wall needs to be ¡
strong enough to hold the projector and the setting plate. Confi rm the weight of the pro-
jector and the setting plate before installation, and check the strength of the wall.
If the wall is not strong enough, reinforce the wall before installation.
(Example) The combined mass of the projector (PDG-DWL2500) and the setting plate is
approximately 14 kg (30.9 lb).
Use commercially available anchors. ¡
Use M12 nuts, bolts and washers (26 mm outside diameter). Nuts and bolts smaller ¡
than M12 could cause the setting plate to fall. (The wall plate must be secured in at
least four places.)
Sanyo takes no responsibility for any damages or injury caused by incorrect installation. ¡
0.27 inch
(68 mm)
0.65 inch
(164 mm)
CTR
line
Template sheet for
installing the wall plate
Center line of the
projection surface
Unit: inch (mm)
0.51 x 1.30
(13 × 33)
1.77 x 3.15
(45 × 80)
5.15
(135)
1.06
(27)
6.77 (172)
8.82 (224)
15.99 (406)
18.23 (463)
Projection
surface
Center line of
the wall plate
D
H
POA-CH-EX06(IJAH).indb 4POA-CH-EX06(IJAH).indb 4 10.9.8 11:21:13 AM10.9.8 11:21:13 AM
 Manymanuals.com
 Manymanuals.de
 Manymanuals.fr
 Manymanuals.it
 Manymanuals.pl
 Manymanuals.cz
 Manymanuals.es
 Manymanuals-pt.com
Comments to this Manuals