Sanyo PLC XP45L User Manual
Browse online or download User Manual for Projectors Sanyo PLC XP45L. Sanyo PLC XP45L User Manual
- Page / 44
- Table of contents
- BOOKMARKS
Rated. / 5. Based on customer reviews
Owner’s Manual
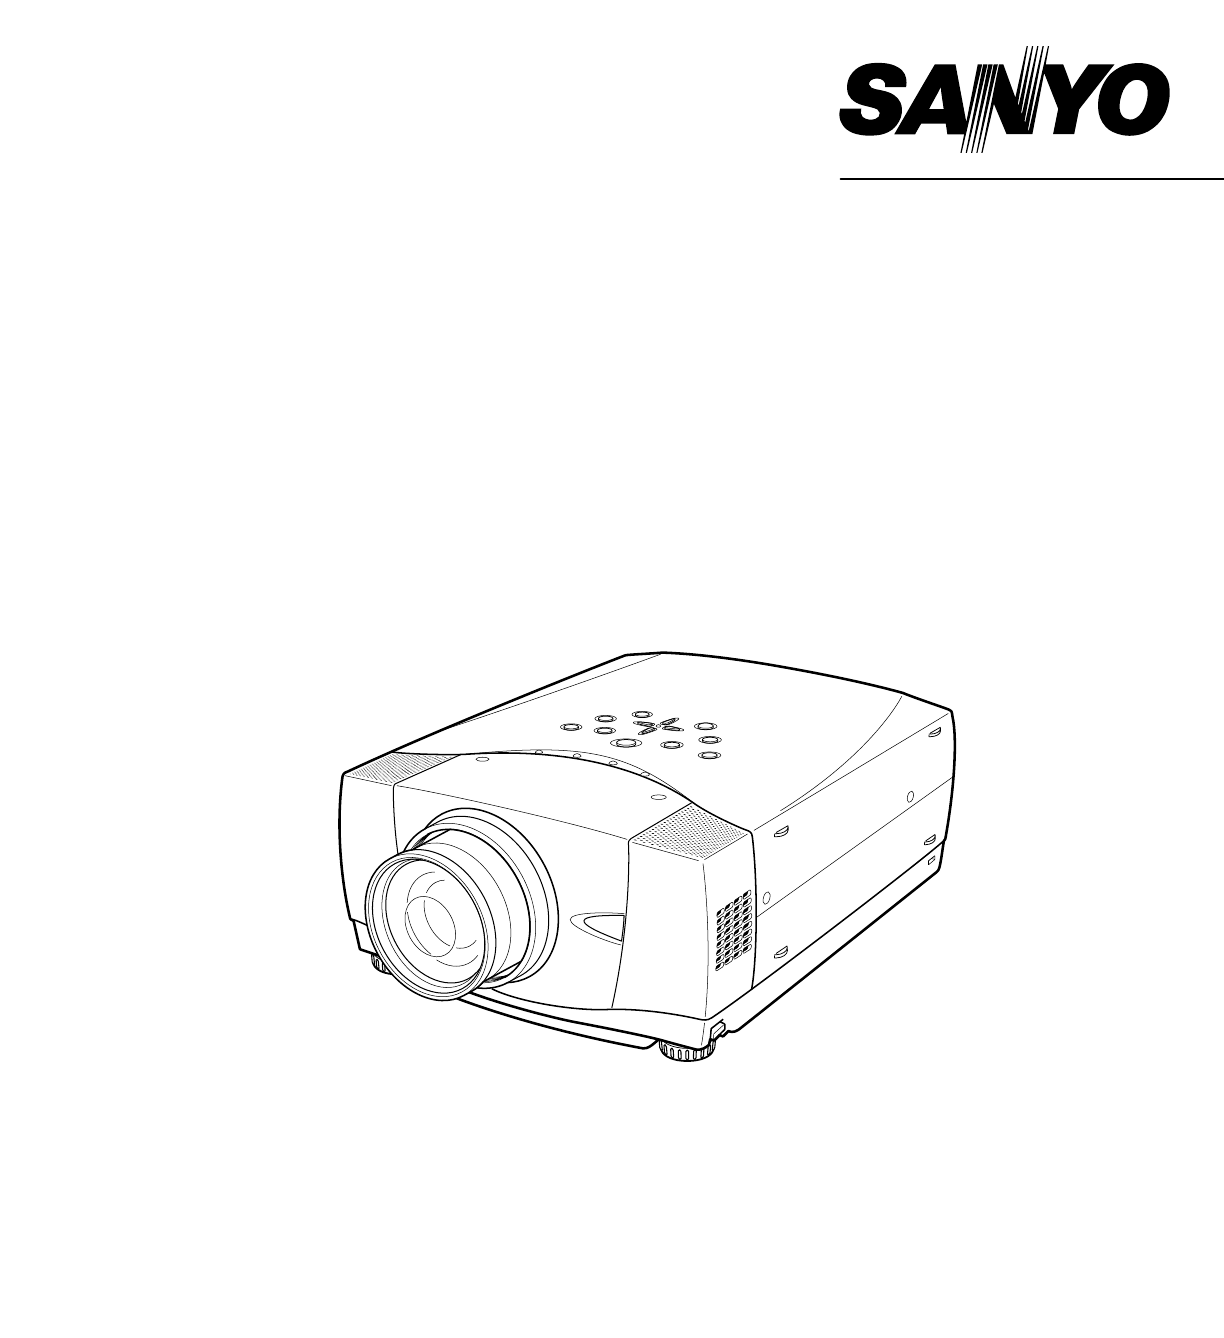
PLC-XP40L
Multimedia Projector
MODEL
PLC-XP45L
✽ Projection lens is optional.
- PLC-XP40L 1
- PLC-XP45L 1
- TO THE OWNER 2
- SAFETY PRECAUTIONS 2
- SAFETY INSTRUCTIONS 3
- COMPLIANCES 4
- TABLE OF CONTENTS 5
- FEATURES AND DESIGN 6
- SETTING-UP PROJECTOR 8
- POSITIONING PROJECTOR 9
- LENS SHIFT ADJUSTMENT 9
- LENS INSTALLATION 9
- PREPARATION 10
- MOVING PROJECTOR 10
- ADJUSTABLE FEET 10
- CONNECTING PROJECTOR 11
- CONNECTING TO COMPUTER 12
- CONNECTING TO VIDEO EQUIPMENT 13
- Left Side 14
- LASER POINTER FUNCTION 14
- OPERATION OF REMOTE CONTROL 14
- BEFORE OPERATION 15
- TOP CONTROLS AND INDICATORS 16
- OPERATING ON-SCREEN MENU 17
- MENU BAR 18
- TURNING ON PROJECTOR 19
- TURNING OFF PROJECTOR 19
- BASIC OPERATION 20
- SOUND ADJUSTMENT 21
- COMPUTER INPUT 22
- PC ADJUSTMENT 23
- MANUAL PC ADJUSTMENT 24
- PICTURE IMAGE ADJUSTMENTS 27
- IMAGE LEVEL ADJUSTMENT 28
- PICTURE SCREEN ADJUSTMENT 29
- VIDEO INPUT 30
- SELECTING VIDEO SYSTEM 31
- SETTING MENU 35
- To change code of Projector; 36
- Time left until Lamp off 36
- OPERATING WIRELESS MOUSE 37
- INSTALLATION 37
- APPENDIX 38
- CLEANING PROJECTION LENS 38
- WARNING TEMP. INDICATOR 38
- AIR FILTER CARE AND CLEANING 38
- LAMP REPLACEMENT 39
- LAMP REPLACE COUNTER 39
- TROUBLESHOOTING 40
- Problem: Try these Solutions 40
- TECHNICAL SPECIFICATIONS 42
- CONFIGURATIONS OF TERMINALS 43
- SANYO Electric Co., Ltd 44
Summary of Contents
Page 1 - PLC-XP45L
Owner’s ManualPLC-XP40LMultimedia ProjectorMODEL PLC-XP45L✽ Projection lens is optional.
Page 2 - SAFETY PRECAUTIONS
10PREPARATIONCAUTION IN CARRYING OR TRANSPORTING A PROJECTOR● Do not drop or bump a projector, otherwise damages or malfunctions may result.● When car
Page 3 - SAFETY INSTRUCTIONS
S–VIDEOR–AUDIO–LVIDEO/Y Cb/Pb Cr/PrVIDEO/Y Cb/Pb Cr/PrRESETCONTROL PORT USBAUDIO 1 AUDIO 2ANALOG DIGITAL(DVI-D)INPUT 1INPUT 2INPUT 3R/C JACKG B R H
Page 4 - COMPLIANCES
S–VIDEOR–AUDIO–LVIDEO/Y Cb/Pb Cr/PrVIDEO/Y Cb/Pb Cr/PrRESETCONTROL PORT USBAUDIO 1 AUDIO 2ANALOG DIGITAL(DVI-D)INPUT 1INPUT 2INPUT 3R/C JACKGBRH/VV
Page 5 - TABLE OF CONTENTS
13CONNECTING PROJECTORCONNECTING TO VIDEO EQUIPMENTS–VIDEOR–AUDIO–LVIDEO/Y Cb/Pb Cr/PrVIDEO/Y Cb/Pb Cr/PrRESETCONTROL PORT USBAUDIO 1 AUDIO 2ANALOG
Page 6 - FEATURES AND DESIGN
14BEFORE OPERATIONVOLUMEON-OFFFOCUSZOOMD.ZOOMMENUMUTELASERKEYSTONENO SHOWFREEZEAUTO PC ADJ.IMAGEP-TIMERLOCKINPUTLENS SHIFTOPERATION OF REMOTE CONTROLO
Page 7
15BEFORE OPERATIONTo insure safe operation, please observe following precautions :● Use (2) AA, UM3 or R06 type alkaline batteries.● Replace two batte
Page 8 - SETTING-UP PROJECTOR
16BEFORE OPERATIONTOP CONTROLS AND INDICATORSUsed to open or closeMENU operation. (P17,18)MENU BUTTONIMAGE BUTTONREADY INDICATORSELECT BUTTONPOWER ON–
Page 9 - LENS INSTALLATION
17HOW TO OPERATE ON-SCREEN MENUFLOW OF ON-SCREEN MENU OPERATIONDisplay ON-SCREEN MENUPress MENU button to display ON-SCREEN MENU (MENUBAR). A red fra
Page 10 - ADJUSTABLE FEET
18BEFORE OPERATIONMENU BARPC SYSTEM MENUUsed to selectcomputer system.(Refer to P22, 23)IMAGE ADJUST MENUUsed to adjustcomputer image. [Contrast / Bri
Page 11 - CONNECTING PROJECTOR
19BEFORE OPERATIONTURNING ON PROJECTORConnect a projector's AC Power Cord into an AC outlet. LAMPIndicator lights RED, and READY Indicator light
Page 12 - CONNECTING TO COMPUTER
2CAUTION : TO REDUCE THE RISK OF ELECTRIC SHOCK, DO NOT REMOVE COVER (OR BACK). NO USER-SERVICEABLE PARTS INSIDE EXCEPT LAMP REPLACEMENT. REFER SERV
Page 13 - CONNECTING TO VIDEO EQUIPMENT
20KEYSTONE ADJUSTMENT1Press KEYSTONE ▲/▼ button on Remote Control Unit or selectKeystone on SETTING menu. (Refer to page 35.) Keystonedialog box app
Page 14 - OPERATION OF REMOTE CONTROL
21BASIC OPERATIONPress FREEZE button on Remote Control Unit to freeze picture on-screen. To cancel FREEZE function, press FREEZEbutton again or press
Page 15 - BEFORE OPERATION
22COMPUTER INPUTSELECTING INPUT SOURCEDIRECT OPERATIONChoose Computer by pressing INPUT button on Top Control or onRemote Control Unit.If projector ca
Page 16 - TOP CONTROLS AND INDICATORS
23COMPUTER INPUTThis projector automatically tunes to most different types of computers based on VGA, SVGA, XGA or SXGA (refer to“COMPATIBLE COMPUTER
Page 17 - OPERATING ON-SCREEN MENU
24COMPUTER INPUTMANUAL PC ADJUSTMENTThis projector can automatically tune to display signals from most personal computers currently distributed. Howe
Page 18 - MENU BAR
25COMPUTER INPUTNOTE : Display area (H/V) and Full screen cannot be adjusted when“1035i (HDTV)” or “1080i (HDTV)” is selected on PCSYSTEM Menu (P23).S
Page 19 - TURNING OFF PROJECTOR
26COMPUTER INPUTCOMPATIBLE COMPUTER SPECIFICATIONSBasically this projector can accept a signal from all computers with V, H-Frequency mentioned below
Page 20 - BASIC OPERATION
27COMPUTER INPUTPICTURE IMAGE ADJUSTMENTSIMAGE LEVEL SELECT (MENU)Press MENU button and ON-SCREEN MENU will appear. PressPOINT LEFT/RIGHT button to m
Page 21 - SOUND ADJUSTMENT
28COMPUTER INPUTPress POINT LEFT/RIGHT buttonsto adjust value.Reset all adjustment to previous figure.ResetStoreCloses IMAGE MENU.QuitOther icons oper
Page 22 - COMPUTER INPUT
29COMPUTER INPUTPICTURE SCREEN ADJUSTMENTThis projector has a picture screen resize function, which enables you to display desirable image size.Press
Page 23 - PC ADJUSTMENT
3SAFETY INSTRUCTIONSAll the safety and operating instructions should be read beforethe product is operated.Read all of the instructions given here and
Page 24 - MANUAL PC ADJUSTMENT
30VIDEO INPUTWhen video input signal is connected to Y-Pb/Cb-Pr/Cr jacks, select Y, Pb/Cb, Pr/Cr.Y,Pb/Cb,Pr/CrSELECTING INPUT SOURCEPress MENU button
Page 25
31VIDEO INPUTAV SYSTEM MENU (VIDEO OR S-VIDEO)AV SYSTEM MENU (COMPONENT VIDEO)SELECTING VIDEO SYSTEMPress MENU button and ON-SCREEN MENU will appear.
Page 26
32VIDEO INPUTPICTURE IMAGE ADJUSTMENTSIMAGE LEVEL SELECT (MENU)Press MENU button and ON-SCREEN MENU will appear. PressPOINT LEFT/RIGHT button to move
Page 27 - PICTURE IMAGE ADJUSTMENTS
33VIDEO INPUTPress POINT LEFT/RIGHT buttonsto adjust value.Press MENU button and ON-SCREEN MENU will appear. PressPOINT LEFT/RIGHT button(s) to move
Page 28 - IMAGE LEVEL ADJUSTMENT
34VIDEO INPUTPICTURE SCREEN ADJUSTMENTThis projector has a picture screen resize function, which enables you to display desirable image size.Press MEN
Page 29 - PICTURE SCREEN ADJUSTMENT
35SETTINGCeilingWhen this function is “On,” picture is top / bottom and left / rightreversed. This function is used to project image from a ceilingmo
Page 30 - VIDEO INPUT
36SETTINGThis function turns Projection Lamp off when this projector detectssignal interruption and is not used for a certain period in order toreduce
Page 31 - SELECTING VIDEO SYSTEM
37SETTING/APPENDIXOPERATING WIRELESS MOUSEINSTALLATIONWireless Remote Control Unit is not only able to operate this projector but also usable as a wir
Page 32
38APPENDIXCLEANING PROJECTION LENSApply a non-abrasive camera lens cleaner to a soft, dry cleaning cloth. Avoid using an excessive amount of cleaner.
Page 33
39APPENDIXLAMP REPLACEMENTWhen life of Projection Lamp of this projector draws to an end, LAMP REPLACEMENT indicator lights yellow. When aprojected i
Page 34
4COMPLIANCESThe AC Power Cord supplied with this projector meets the requirement for use in the country you purchased it. AC Power Cord for the Unite
Page 35 - SETTING MENU
40APPENDIXTROUBLESHOOTINGBefore calling your dealer or service center for assistance, check matters below once again.1. Make sure you have connected a
Page 36 - Time left until Lamp off
41APPENDIXRemote Control Unitdoes not work.● Check batteries.● Check ALL-OFF switch on Remote Control Unit is set to “ON.”.● Make sure nothing is betw
Page 37 - INSTALLATION
Multi-media Projector42APPENDIXAccessories● Specifications are subject to change without notice.TECHNICAL SPECIFICATIONS1.3" TFT Active Matrix ty
Page 38 - AIR FILTER CARE AND CLEANING
43APPENDIXCONFIGURATIONS OF TERMINALSCOMPUTER INPUT-1 TERMINAL (ANALOG)Terminal : HDB15-PIN Connect display output terminal of computer to this termin
Page 39 - LAMP REPLACE COUNTER
Printed in JapanPart No. 610 298 6082 (1AA6P1P3218-- MA8AL)SANYO Electric Co., Ltd
Page 40 - Problem: Try these Solutions
5TABLE OF CONTENTSFEATURES AND DESIGN 6BEFORE OPERATION 14COMPUTER MODE 22VIDEO MODE 30SETTING 35APPENDIX 37PREPARATION 7NAME OF EACH PART OF PROJECTO
Page 41
6FEATURES AND DESIGNThis Multimedia Projector is designed with most advanced technology for portability, durability, and ease of use. Thisprojector u
Page 42 - TECHNICAL SPECIFICATIONS
7PREPARATIONNAME OF EACH PART OF PROJECTORBOTTOM OF CABINETBACK OF CABINETHOT AIR EXHAUSTED !Air blown from exhaust vent is hot. Whenusing or install
Page 43 - CONFIGURATIONS OF TERMINALS
NOTE ON POWER CORDAC Power Cord must meet requirement of country where you use a projector.Confirm an AC plug type with chart below and proper AC Powe
Page 44 - SANYO Electric Co., Ltd
9PREPARATION10 : 011Projection lens can be moved up and down with motor-driven lens shift function. This function makes it easy toprovide projected i
Related products and manuals for Projectors Sanyo PLC XP45L
Projectors Sanyo XP51L User Manual
 (56 pages)
(56 pages)
Projectors Sanyo PLC-XP21N User Manual
(54 pages)
(54 pages)
Projectors Sanyo POA-HDTM01 User Manual
(40 pages)
(40 pages)
Projectors Sanyo PLC-EF60A User Manual
(1 pages)
(1 pages)
Projectors Sanyo PLC-WM4500 User Manual
(1 pages)
(1 pages)
Projectors Sanyo PDG-DXT10 User Manual
(2 pages)
(2 pages)
Projectors Sanyo 710-00792-1 User Manual
(8 pages)
(8 pages)
Projectors Sanyo PLC-XM150 User Manual
(2 pages)
(2 pages)
Projectors Sanyo PDG-DWL2500 User Manual
(82 pages)
(82 pages)
Projectors Sanyo PLC-EF60 User Manual
(84 pages)
(84 pages)
Projectors Sanyo PLC-EF31NL User Manual
(52 pages)
(52 pages)
Projectors Sanyo PLC-WXE46 User Manual
(65 pages)
(65 pages)
Projectors Sanyo PLC-WL2503 User Manual
(78 pages)
(78 pages)
© 2020, manymanuals.com. All rights reserved. | 2.276 s |
 Manymanuals.com
 Manymanuals.de
 Manymanuals.fr
 Manymanuals.it
 Manymanuals.pl
 Manymanuals.cz
 Manymanuals.es
 Manymanuals-pt.com
Comments to this Manuals